
Let’s figure out how to repair your refrigerator without outside help, given the nature of the problem.
Tools needed
To repair your refrigerator, you will need preparation:
- A pipe rolling tool;
- A pressure gauge that measures the pressure in the system;
- Pipe cutter;
- Connecting hoses;
- Thermometer;
- Vacuum pump;
- Electronic scales;
- Gas burner;
- Electrical performance meter;
- A set of couplings.
Most of this equipment is included in the equipment of a specialized workshop and will not always be available at home. Therefore, in the event of a serious malfunction, especially one involving the need to replace the compressor, it is better to contact the service department. Such work requires depressurization of the refrigerator cooling circuit, which is difficult at home.
Diagnostics of nodes and elements of the refrigerator
The order and the structure of the future work depend on the nature of the failure of the failed node. Further is more detailed information about the repair of the separate elements and systems.
It will be necessary to carry out diagnostics beforehand in order to establish the cause of the breakdown. When the “diagnosis” is set, you can begin to eliminate the defect.
Thermostat malfunction
A broken thermostat is indicated by a temperature malfunction. If the refrigerator does not cool the chamber to the desired degree, one of the main reasons is a malfunction related to the regulator. Also the failure of this node indicates excessive cooling of the unit.

The location of the thermostat may differ depending on the model and its design features. If this node is installed inside the refrigerating chamber, the access to it is open – it is necessary to remove the knob with which the temperature is set and dismantle the regulator body.
For Samsung, LG and other imported models it is also characteristic that the thermostat is located under the temperature control panel, but the node is placed outside the chamber.
Check with diagnostics of the device is performed in the following sequence:
- Disconnect the unit from the mains;
- Fully defrost the unit;
- Set the regulator to the most intensive level of freezing, placing a thermometer inside the freezer compartment to measure the actual temperature.
If it does not show more than 7 degrees plus, the thermostat will need to be replaced. You will need to buy a similar part and install it to replace the failed one.
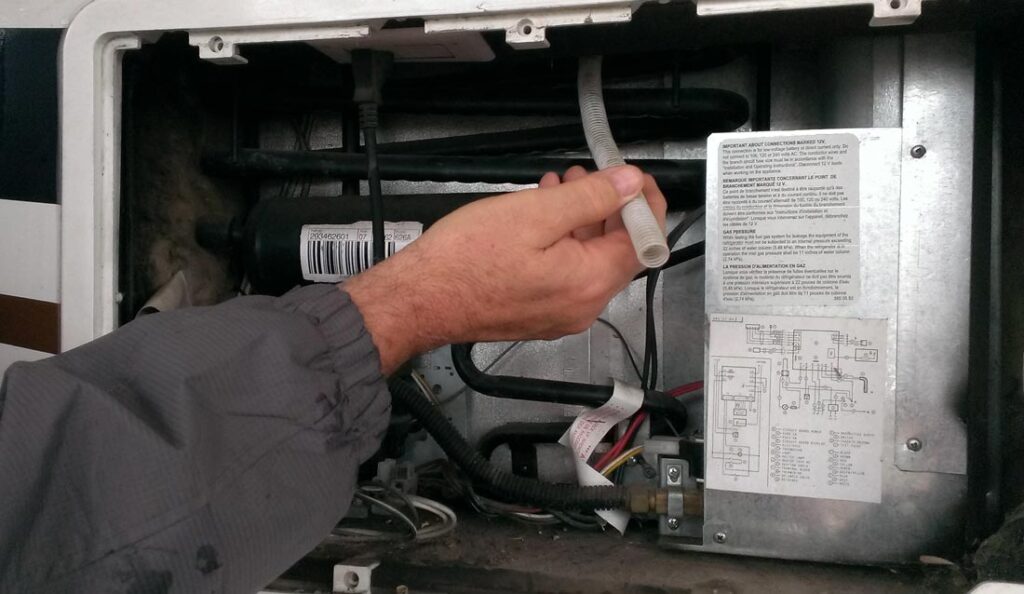
Refrigerant leakage
Refrigerant leakage is indicated by intensive operation of the unit without long shutdown. The red light may come on, signaling the necessity of checking.
This problem can be diagnosed in the following ways:
1. Apply a soapy solution to all the pipes of the system – access to the various sections of the circuit is necessary:
- Effective if the leak is small and pressure in the system is maintained;
- It will be necessary to remove the protective cap beforehand by defrosting the evaporator;
- The solution will foam at the leakage point.
2. By means of a dye – if the pressure has dropped so much that the soap solution will not indicate the damage. The dye component is added to the freon – the place of the leak will show up with the corresponding color of the dyed refrigerant.
To fix the fault, the refrigerator is completely turned off and defrosted. The rest of the refrigerant is pumped out with a vacuum pump and the clogs are removed. At the end new liquid is pumped in.
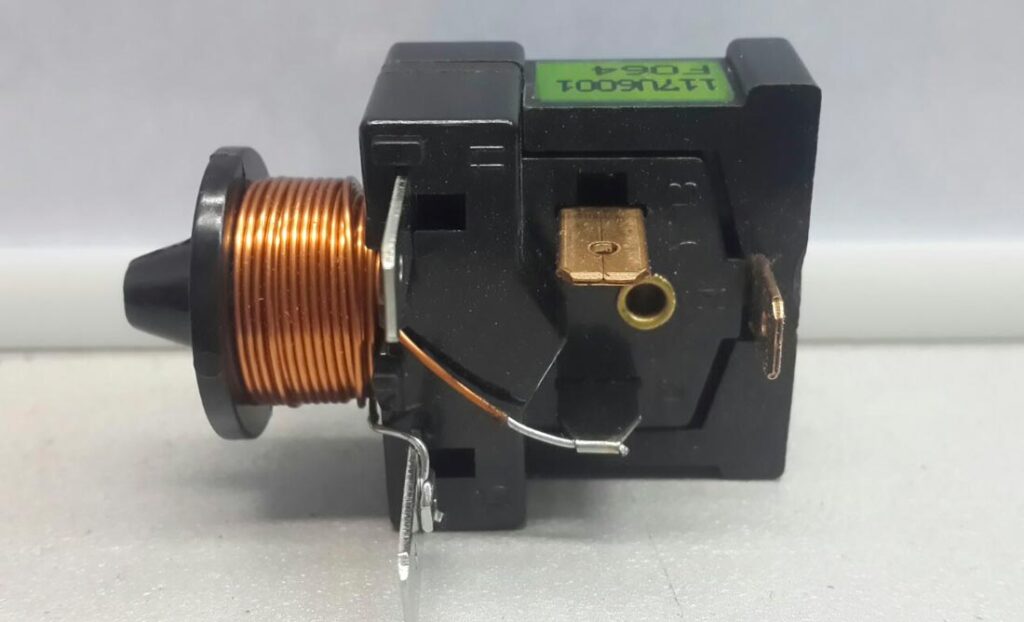
Thermal protection relay failure
Breakdown of the thermal overload relay causes the unit to shut down prematurely. This can cause the compressor to overheat. If the relay should fail, it can be removed by opening the casing first.
If the matter is in the jammed rod, the unit can be easily repaired by yourself, but the damaged winding will need to be replaced.
Compressor malfunction
When diagnosed, a compressor malfunction is indicated by the lack of cold in the chambers. Also the unit may not turn on. Repair of the motor at home is impossible, but also specialists of the service center are unlikely to restore the compressor in case of breakage.
To replace the compressor, it is necessary to:
- Disconnect the power supply;
- Tilt the motor, letting the current run for two minutes;
- Attach a piercing valve to the filter-drier, secure the cylinder and open it for a few tens of seconds;
- Replace the filling tube with a copper one by soldering it in place;
- Cut capillary tube;
- Dismantle faulty compressor, plug discharge and suction outlets;
- Install a new motor, carefully solder the connections, making sure they are tight.
Sometimes the compressor makes a rattling noise when the refrigerator is running. It can be connected with loose fasteners of metal parts or with motor adjoining to other structural elements.
To eliminate the problem, the compressor is positioned correctly and the loosened connections of the parts are tightened. Fasteners are sealed with washers.
Light bulbs
If the light in the refrigerator chamber is lost – the problem is most often in the failure of the lamp. To replace the consumable element of the refrigerator, buy an analogue of the lighting device and install it instead of the failed one.
The power of the lamp should not exceed 30 W. The new element is selected by analogy with the original one. Before installation, measure the voltage in the socket in order to check and diagnose the connecting fixture, excluding its defects.
Temperature sensors
Faults in these elements are typical of Nord refrigerators. In these models, sometimes several devices fail at the same time. This breakdown causes malfunction of the compressor.
The temperature sensor of the refrigerator can not be disassembled and repaired by yourself, so it will be necessary to replace the faulty unit.
Drainage
If the drain tubes become clogged, moisture begins to accumulate and ice actively freezes inside the refrigerator. These liquid removal system elements are located on the outside of the enclosure or on the inside.
If the element is located on the outside, the tube can be easily removed and washed with hot water. Otherwise the channel is cleaned with a blunted wire, washing some places.
Control board failure
If the control board fails, the refrigerator does not work when it is plugged in. It is a complex and expensive part, so the repair in the service center is a costly procedure.
In most refrigerator models, the board is located inside the plastic case at the bottom back, near the compressor. What you need to do:
- Unplug the unit by turning the back side out;
- Open the case of the board by unscrewing the self-tapping screws and pushing aside the retainer;
- Disconnect the part by pulling contacts out of connectors and install a new one.
The failure of the board is caused by the failure of the capacitors. Power surges in the mains lead to this. To prevent the capacitors from burning out prematurely, the refrigerator is connected through a stabilizer. Alternatively, you can install a voltage regulator at your apartment’s mains.
Diagnostics of parts and elements of No-Frost refrigerator
Certain nuances and differences in constructive device are peculiar for refrigerators with No-Frost system. It is necessary to take them into account while diagnosing and checking the condition of the unit, searching for the reasons of malfunction.
Distinctive features of the No-Frost design
The No-Frost design features a ventilation system whereby the cold air circulates inside the individual cold rooms. In this way a stable temperature is maintained and no ice is formed.
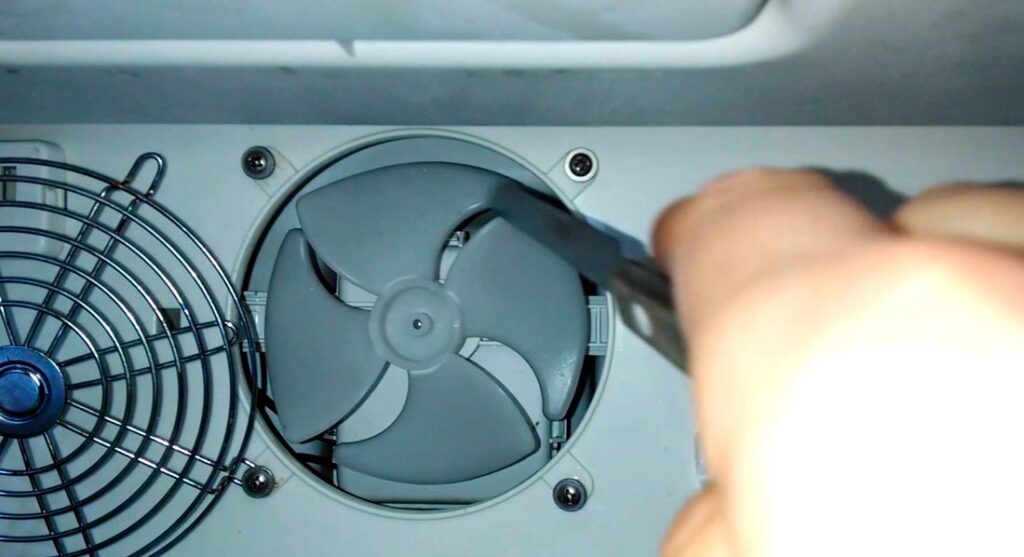
Fan
The fan is the decisive component in the functioning of the unit. To diagnose and check for malfunctions, it is sufficient to listen to the operation of the device. Air flow is determined by putting the palm of your hand to the ventilation holes.
Excessive noise, rattling of the fan, poor air circulation indicate wear and need for replacement.
To visually inspect the freezer compartment cover on the back wall, remove it. It is important to verify the integrity of the impeller blades. If the assembly is defective, a new one is installed to replace it.
Defrost system
This refrigerator system consists of the following elements:
- A timer that controls the cycles;
- Two thermal relays for the upper and lower temperature thresholds;
- The heating component.
The timer sets the defrost time at which the heater (with the compressor turned off) and the heater evaporator start. Ice melts as moisture is removed through the drainage system. After reaching the upper temperature threshold, the compressor starts.
To diagnose the operability of this refrigerator system it is necessary:
- Dismantle the evaporator cover (on the back wall), fan;
- Disconnect the timer by turning the knob or pressing the button.
As a result compressor is switched off, heating elements are heated. If the heating element does not start, check its integrity, the relay operation by measuring the characteristics. A new part is installed instead of the worn-out one.
Repairing the refrigerator yourself with your own hands is a difficult thing to do. If the owner is not confident in their own abilities, it is recommended to turn to the service of repair of household appliances. But with knowledge and experience, the refrigerator can be repaired yourself, which will save time and money.